If you are a developer then surely you might have used
JSON (JavaScript Object Notation) but, if not then don’t worry
you might use sooner than later. JSON is kind of ecosystem
which is most popular in the various area for exchanging the data. If you talk
about charting solution, AJAX, Mobile services or any 3rd party
integration then generally JSON is the first choice of the developers.
If you see nowadays most of the NOSQL database like Microsoft
Azure Document DB, MONGODB etc. also using JSON ecosystem and some of them are
based on JSON.
As it is such a popular growing system So, why not in SQL
SERVER?
In SQL SERVER 2016 JSON introduced. This we can say a step or
bridge between NON-relation database and relational database by Microsoft SQL
SERVER
SQL Server 2016 providing following capabilities when you are
using JSON
-
Parse JSON by relation query
-
Insert & update JSON using query
-
Store JSON in database
If you see it then conceptually it is similar to XML
data type which you might use in SQL SERVER.
The good thing in SQL SERVER 2016 for JSON there is no
Native data type. This will help in migration from any NOSQL
to SQL SERVER.
SQL server provides bidirectional JSON
formatting which you can utilize in a various way. Suppose data is
coming from the external source in the JSON format then you can parse it and
store in table structure (if required) in another case external source require
data in JSON format while data in SQL SERVER in tabular format so both the
purpose can easily solve with SQL SERVER’s JSON feature.
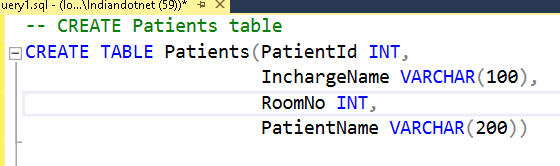
Now, let’s jump directly to the practical to check JSON
capabilities in SQL SERVER
1) FOR JSON AUTO
It is similar to FOR XML AUTO. It will
return JSON object of selected column where column name is treated as a Key or
in other words we can say it will format the query result in JSON.

when you run above command the result will be like as shown in
below figure.

2) FOR JSON PATH: -
It’s exactly like JSON auto the only difference is instead of
SQL SERVER we have full control over the format. JSON Auto take predefined
column schema while with JSON path we can create a complex object.
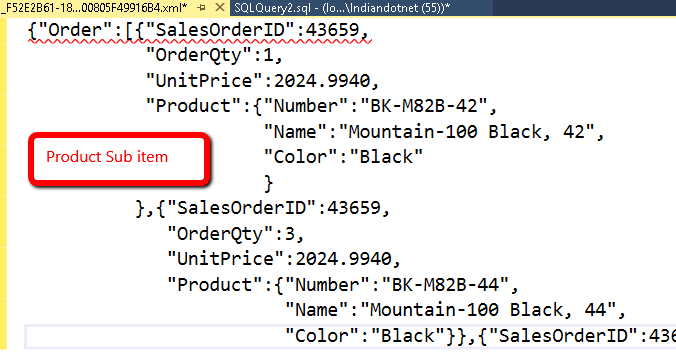
For example, we are using AdventureWorks Sales
order table and joining that with product table to get sub-node. If you see in
below image we have added Root node as well. This root Node can be added in JSON
auto as well if required.

Now, when you run the above query we can get complex JSON
object as follows
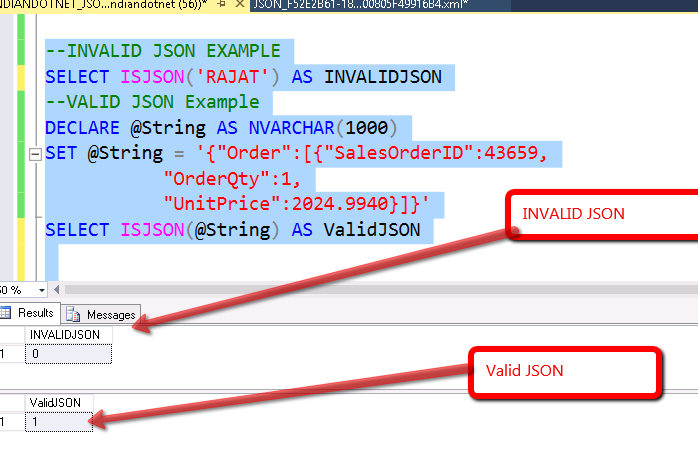
3) IsJSON function:-
By the name, it is clear that this is a validating function.
To cross check whether the provided string is a valid JSON or
not we can run ISJSON.
4) JSON_VALUE:-
By the name, it is clear that if you want to get the value of
the particular key of JSON then you can use this beautiful function which is
JSON_VALUE.

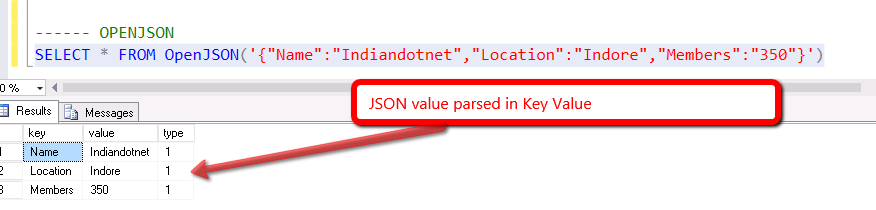
5) OPENJSON function:-
This is a very beautiful function which you can use to parse
external schema. Suppose, you got a JSON string from a mobile service which you
will directly pass to SQL Sever and SQL SERVER stored procedure will do rest of
the operation to parse it. The parsing and other operation can be easily handled
by OPENJSON. The only tweak here that it required database
compatibility level 130 which you need to do (if not compatible with
level 130)
There are many other interesting things which we will cover
later.
Please, provide your inputs.
RJ